
Picking the values for a simple parallel treble bleed may seem like a headache, so lets keep this to a simple 3 steps!
Step 1 – Pick Your Cable
Our cable, both the length and material, is the main factor on the value of the capacitor we choose for the treble bleed. What difference will these make?
The capacitor we choose is basically there to offset the the capacitance of the cable! The longer the cable, the greater the capacitance. Along with this there are a variety of cable materials, and manufacturing methods, each with a capacitance difference. The higher the capacitance, the darker the tone and greater the treble loss as the volume is decreased. So pick a cable length, manufacturer and then stick with it. If you use a 10ft cable for home practice, it’s going to sound different to a 30ft cable used on stage.
Cable could be something you may not have paid much attention to before. If you’re someone who likes good quality cable then I cannot recommend enough going to a smaller custom cable maker like Chris at Practical Patch. You’d be surprised how inexpensive it is to have expert knowledge on tap to help you pick a good cable material, connector type, as well as get the stand-out style you’d really like to have on stage!
The main message here that a consistent treble bleed sound needs a consistent choice in cable.
Step 2 – Identify your Volume Pot
The reason we have a resistor in parallel with the capacitor is to stop us having too much of a brash sound from the treble bleed as we lower the volume. But this can be taken too far, and we could end up a muddy sound. The value of our guitar volume pot affects the choice we make.
The most common values of Pot used most guitars are 250kohm and 500kohm. Both of these have a different sound, with the 500k sounding brighter, hence being commonly used in Humbucker equipped guitars. Although not very common some guitars use values as big as 1Mohm!
So with this information let’s go onto step 3 and choose our components.
Step 3 – Choose Components
So armed with the information from the previous steps we now need to apply them to some rules of thumb. Kevin Kretch of drkevguitar.com kindly gave me the simple rules that he follows below. These are a great starting point for picking a capacitor and resistance value for use with the Treblemaker that can then be tweaked to your own preference.
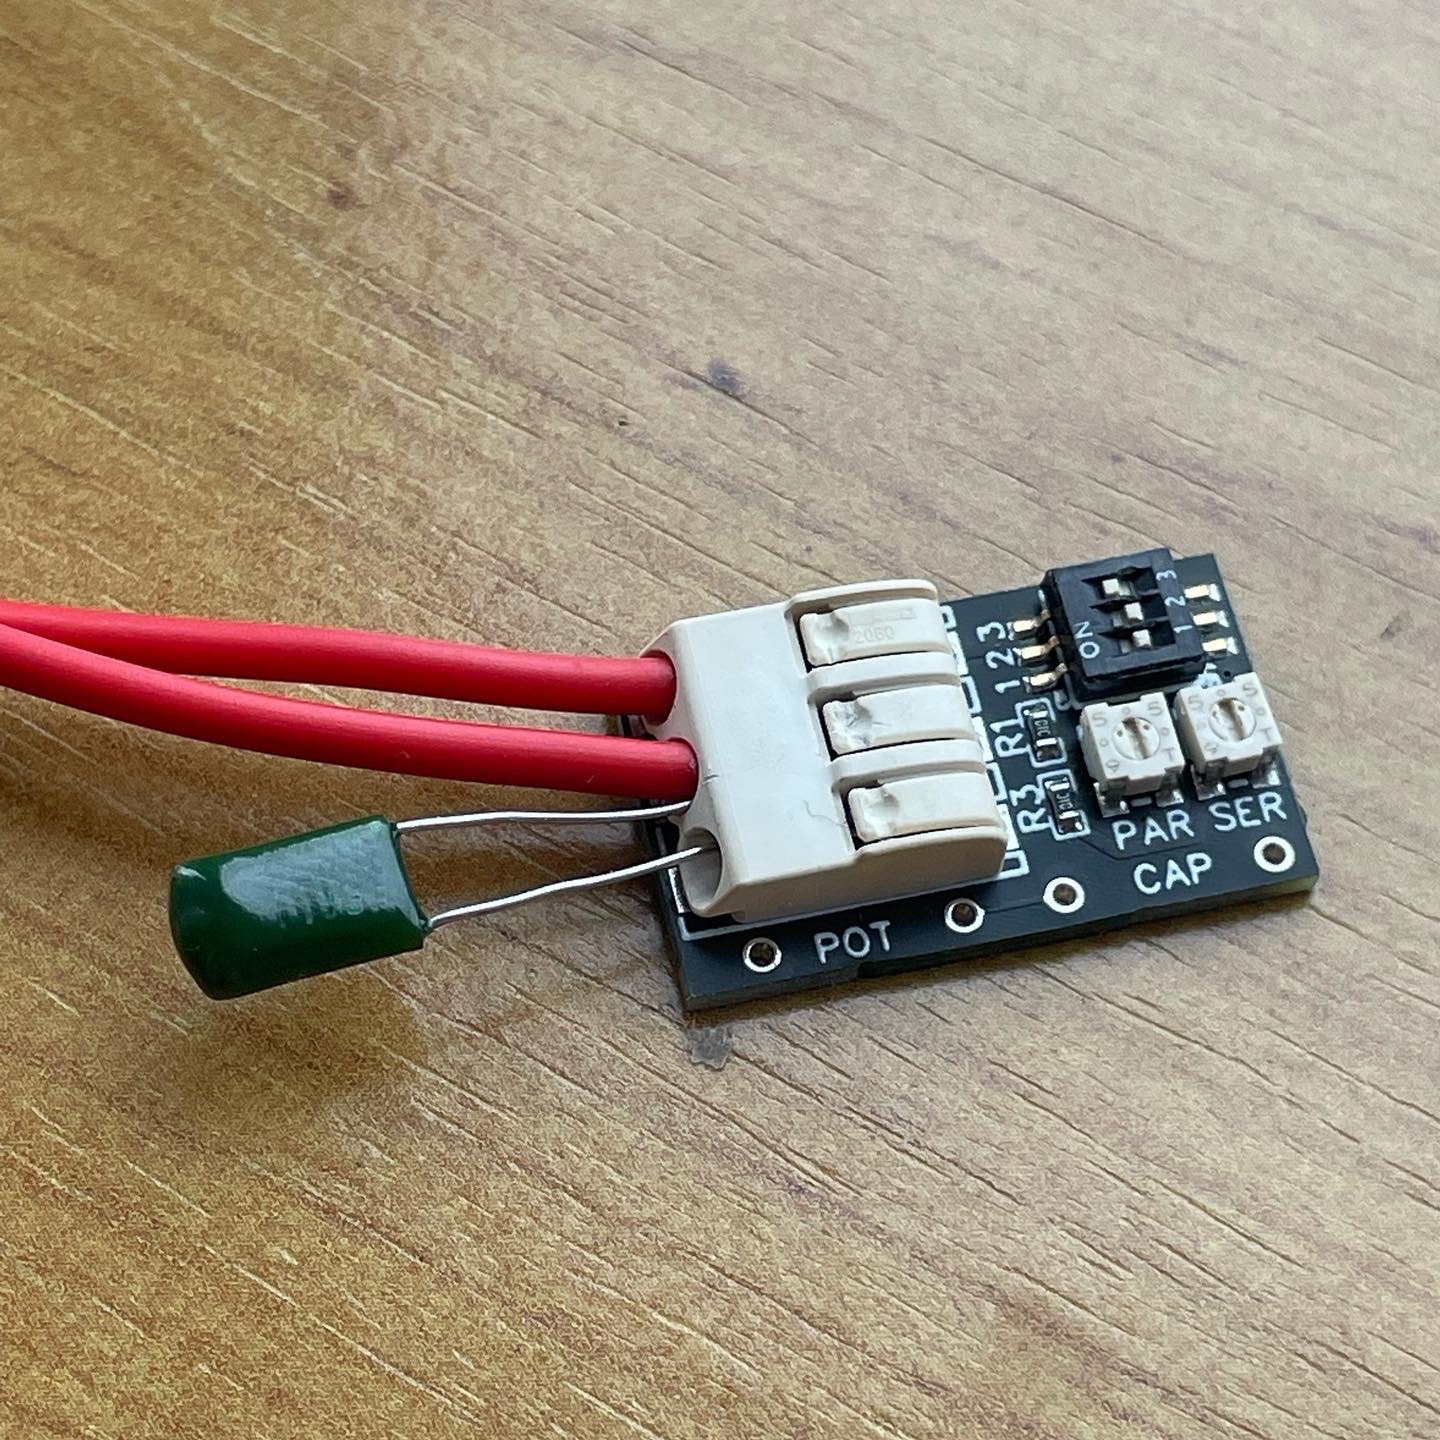
- The capacitor should match the cable capacitance or maybe 100pF higher to make sure that the resonant peak stays about the same in the lower half of the volume knob sweep. So for a 10ft cable this would most likely be a 470pF, 560pF or 680pF capacitor. A 30ft cable capacitor choice would be 1nF, 1.2nF or 1.5nF
- The resistance would be 50% to 70% of the nominal pot value. So for 250k, between 120k and 160k. For 500k it would be between 250k and 330k. Any more than this and as we get to the lower end of the volume sweep we could lose some of the bass.
So how about adding in a series resistor? I see this as being a way to dial up or down the amount of treble bled into the signal, after you’ve gotten as close as you can with the parallel resistor. Just my personal preference. After experimenting yourself, you’ll come up with your own preference.
I would highly recommend having a look at this excellent article on DrKevGuitar.com. It has a great round up of the common values used by a lot of guitar manufacturers, some of which use a series resistor, like the Fender Tone saver. But ultimately you need to experiment yourself! It’s your own ear that needs to be happy with the final result. So grab your Treblemaker and get tweaking!
-
 Treblemaker Slimline – Signature Treble Bleed SystemPrice range: 15,00 € through 30,00 €
 -
 Treblemaker – Signature Treble Bleed System21,00 €
You’re so awesome! I don’t believe I have read a single thing like that before. So great to find someone with some original thoughts on this topic. Really.. thank you for starting this up. This website is something that is needed on the internet, someone with a little originality!
Very well presented. Every quote was awesome and thanks for sharing the content. Keep sharing and keep motivating others.
Great content! Keep up the good work!